How to Install Pressure Relief Valve: Safe & Easy Guide
Right, before you even pick up a spanner, let's talk about what you're actually working with. Installing a new pressure relief valve (PRV) isn't just a case of swapping out an old part. You need to get this right. The basic steps are shutting down the system, draining it, removing the old valve, sealing the threads on the new one, and screwing it in until it's snug. But the devil is in the details.
Crucially, you must ensure the new valve's pressure rating is a perfect match for your system's specifications. Getting this wrong isn't an option—it’s a major safety risk.
Know Your System Before You Start
First things first, you need a solid grasp of why a pressure relief valve is arguably the most important safety device on your equipment. Whether it's a water heater, a boiler, or an air compressor, the PRV is the silent guardian preventing a dangerous build-up of pressure. When things get too hot or pressurised, it automatically opens to vent the excess, stopping a potentially catastrophic failure in its tracks.
To do the job properly, you have to identify the exact type of valve your system needs. Different systems have very different demands. It's well worth taking a moment to understand the various https://www.solenoid-valve.world/pressure-relief-valves available to make sure your choice is spot on for your application. This isn't a "close enough is good enough" situation; it's non-negotiable for a safe and reliable installation.
Know Your System's Pressure and Regulations
Before you get your hands dirty, you need the full picture of your system's current state. That means knowing its operating pressure, which you can check accurately with a reliable pressure gauge. The valve you install must have the correct pressure (measured in bar) and temperature rating clearly printed on its tag or body. If you fit one with a rating that's too low, it'll constantly drip and waste energy. If the rating is too high, it simply won't open when it's supposed to, defeating its entire purpose.
A mismatched pressure rating is one of the most dangerous DIY mistakes you can make. It renders the safety valve completely useless and puts your property—and your safety—at significant risk. Always, always double-check the manufacturer's data plate on your appliance.
In the UK, you also have to consider compliance. The Pressure Equipment (Safety) Regulations 2016 (PE(S)R) are in place for a reason, governing how valves are installed and tested on any equipment designed to run above 0.5 bar. Even for non-hazardous fluids like water, these safety valves must meet stringent standards to get their CE marking, which is your guarantee of quality control.
Before proceeding, run through this quick checklist. It's a simple step that can save you a world of trouble later on.
Essential Pre-Installation Checklist
Here’s a quick rundown of what to confirm before you begin. Taking a few minutes to verify these points ensures you have the right part and are ready for a smooth installation.
| Check Item | Verification Detail | Why It Matters |
|---|---|---|
| Appliance Data Plate | Locate the manufacturer's plate on your boiler, water heater, etc. | This is the source of truth for your system's required pressure and temperature ratings. |
| New Valve Rating | Compare the pressure (bar) and temperature (°C) on the new PRV with the data plate. | The ratings must match exactly. A mismatch can lead to constant dripping or failure to operate. |
| Thread Size & Type | Check if the new valve's threads (e.g., 1/2" BSP) match the port on your system. | An incorrect thread size means the valve won't fit, wasting your time. |
| UK Compliance | Ensure the new valve is CE marked and compliant with PE(S)R. | This confirms the valve has been tested to meet UK safety standards for pressurised systems. |
Once you’ve ticked off every item on this list, you can be confident you’re starting the job on the right foot.
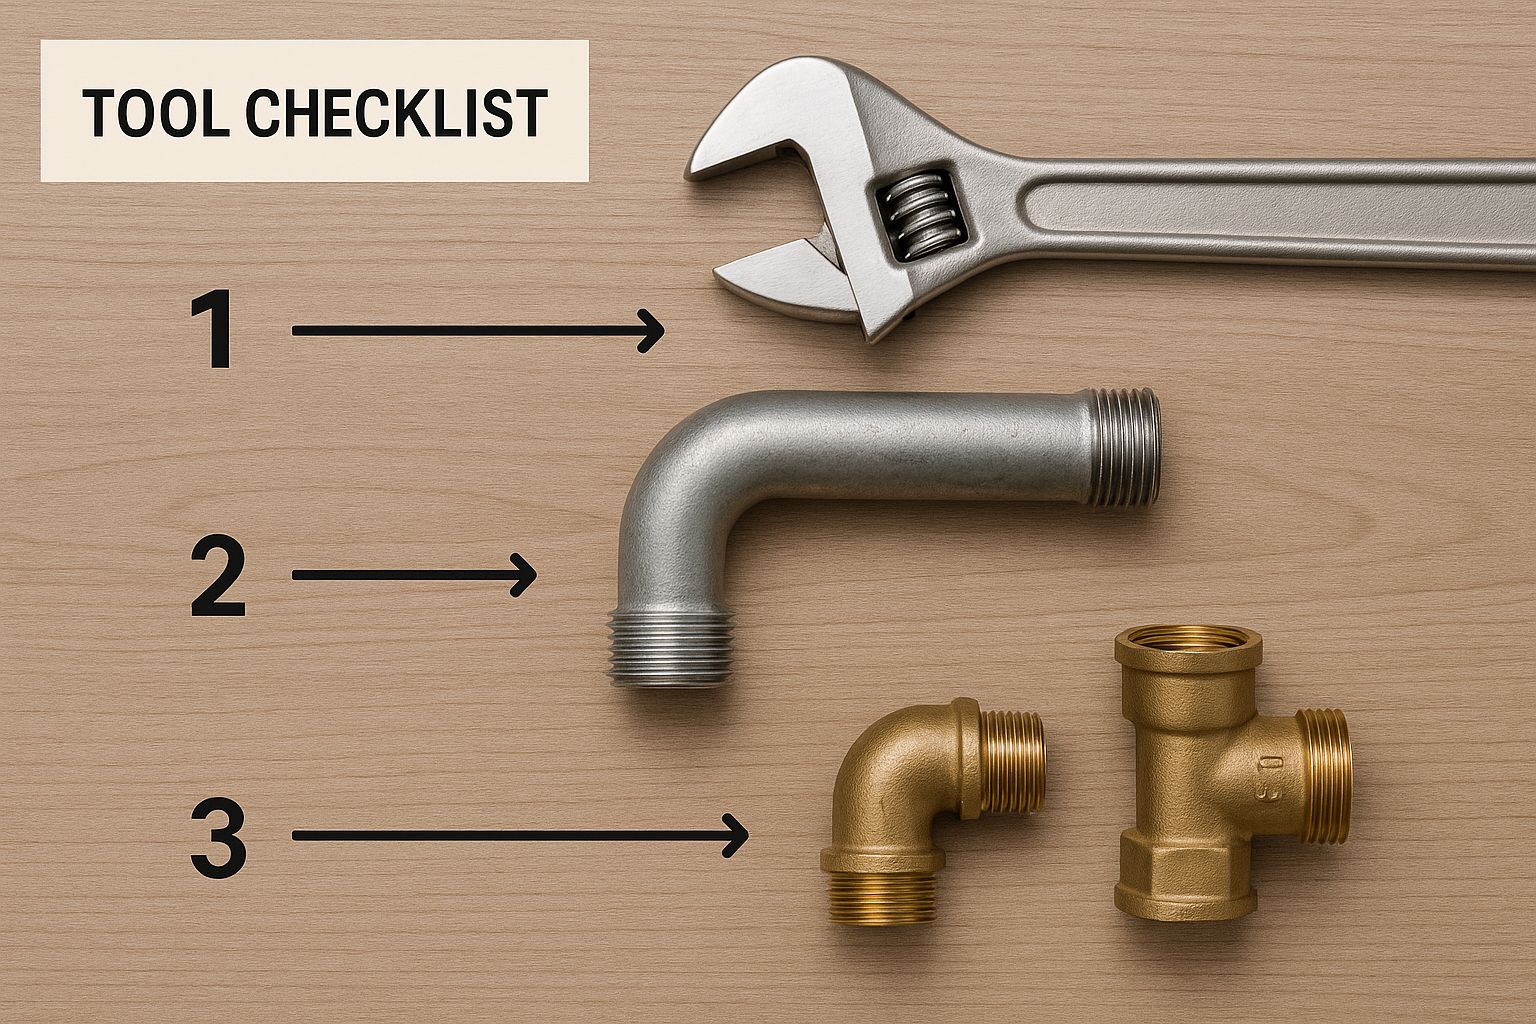
Gathering Your Tools and Prepping the System
Any successful installation starts long before you even touch the valve itself. Getting your tools and the system ready isn't just about making the job easier; it's a critical process to prevent serious injury or property damage. Think of it as setting the stage for a leak-free, safe outcome.
Before you even think about starting, grab your essential tools. You’ll absolutely need two good-quality pipe wrenches—one to hold the existing pipe fitting steady and the other to turn the valve. This two-wrench technique is something I can't stress enough. It stops you from putting dangerous stress on fragile pipework, which could easily cause a fracture. You will also need a wire brush for cleaning old threads and a few rags for the inevitable clean-up.
Essential Supplies and Safety Prep
Choosing the right thread sealant is another key decision. Your main options are PTFE tape (often called Teflon tape) and pipe dope, which is a paste-like sealant. PTFE tape is clean and easy to use, but from my experience, pipe dope often provides a more robust, long-lasting seal, especially on older or slightly imperfect threads.
For most water heater PRV jobs, though, several wraps of high-density PTFE tape will work perfectly. Just make sure you apply it clockwise.
With your supplies ready, the safety preparations are completely non-negotiable.
- Shut off the supply: For a water heater, this means closing the main water valve. A critical first step is knowing how to shut off your main water supply to prevent an accidental flood. If you're working on an air compressor, unplug it from the power source. Simple.
- Depressurise the system: This is the most vital safety step. Open a hot tap somewhere in your house to relieve the pressure in the water heater tank. For an air compressor, open the tank drain valve until the pressure gauge reads zero.
- Drain the tank: You don't need to empty the whole thing, but draining it until the water level is below the valve port will stop a major spill when you remove the old PRV.
Never, ever attempt to remove a pressure relief valve from a pressurised system. The sudden release of hot water, steam, or compressed air can cause severe burns and projectile injuries. Always verify the system is at zero pressure before you proceed.
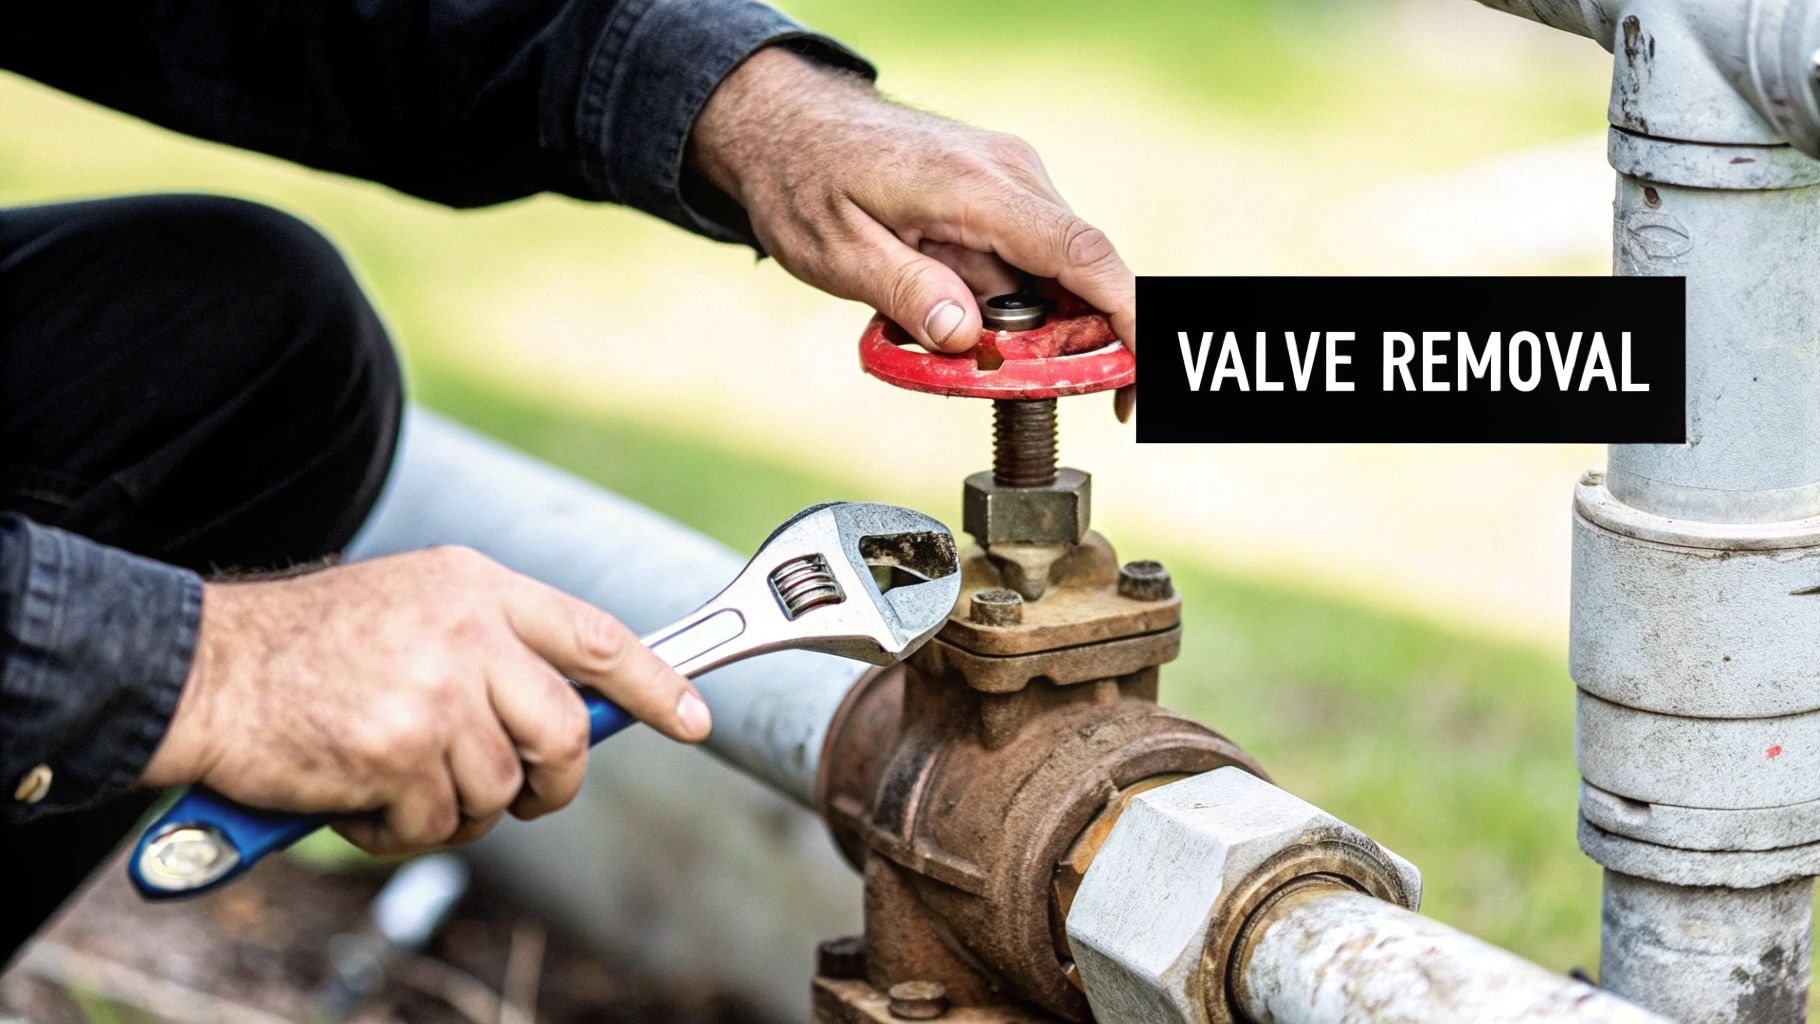
Getting a Leak-Free Installation
Right, let's get our hands dirty. With the system safely shut down and depressurised, it's time to get that old valve off and fit the new one properly. This is where a bit of care and the right technique will save you a world of headaches from leaks down the line.
Getting the old valve off can sometimes take a bit of gentle persuasion, especially if it's been sitting there for years. This is where the two-wrench method is non-negotiable. Clamp one wrench onto the pipe fitting to hold it steady, and use the second to turn the old valve anticlockwise. This simple trick stops you from twisting, or worse, snapping the pipe itself.
Once the old valve is off, you’ll probably see some old sealant and general grime caked on the pipe threads. It’s absolutely vital to get these spotless. Grab a wire brush and clean them until the metal is shining. Any gunk left behind will just ruin the seal on your new valve.
Nailing the Perfect Seal
The real secret to a connection that doesn't drip is all in how you seal the threads. While you can use pipe dope, for most jobs around the house like a water heater, high-density PTFE tape is the perfect choice. The trick is all in the application.
You must wrap the tape clockwise around the male threads of your new valve. If you wrap it anticlockwise, it will simply bunch up and unravel as you tighten the valve, completely defeating the purpose. Aim for three to five snug wraps, making sure the tape settles nicely into the threads.
This handy infographic breaks down the essential tools you'll need to have ready before you even think about starting.
Having these specific tools laid out and ready to go, particularly the two pipe wrenches, is the foundation for a smooth and safe installation.
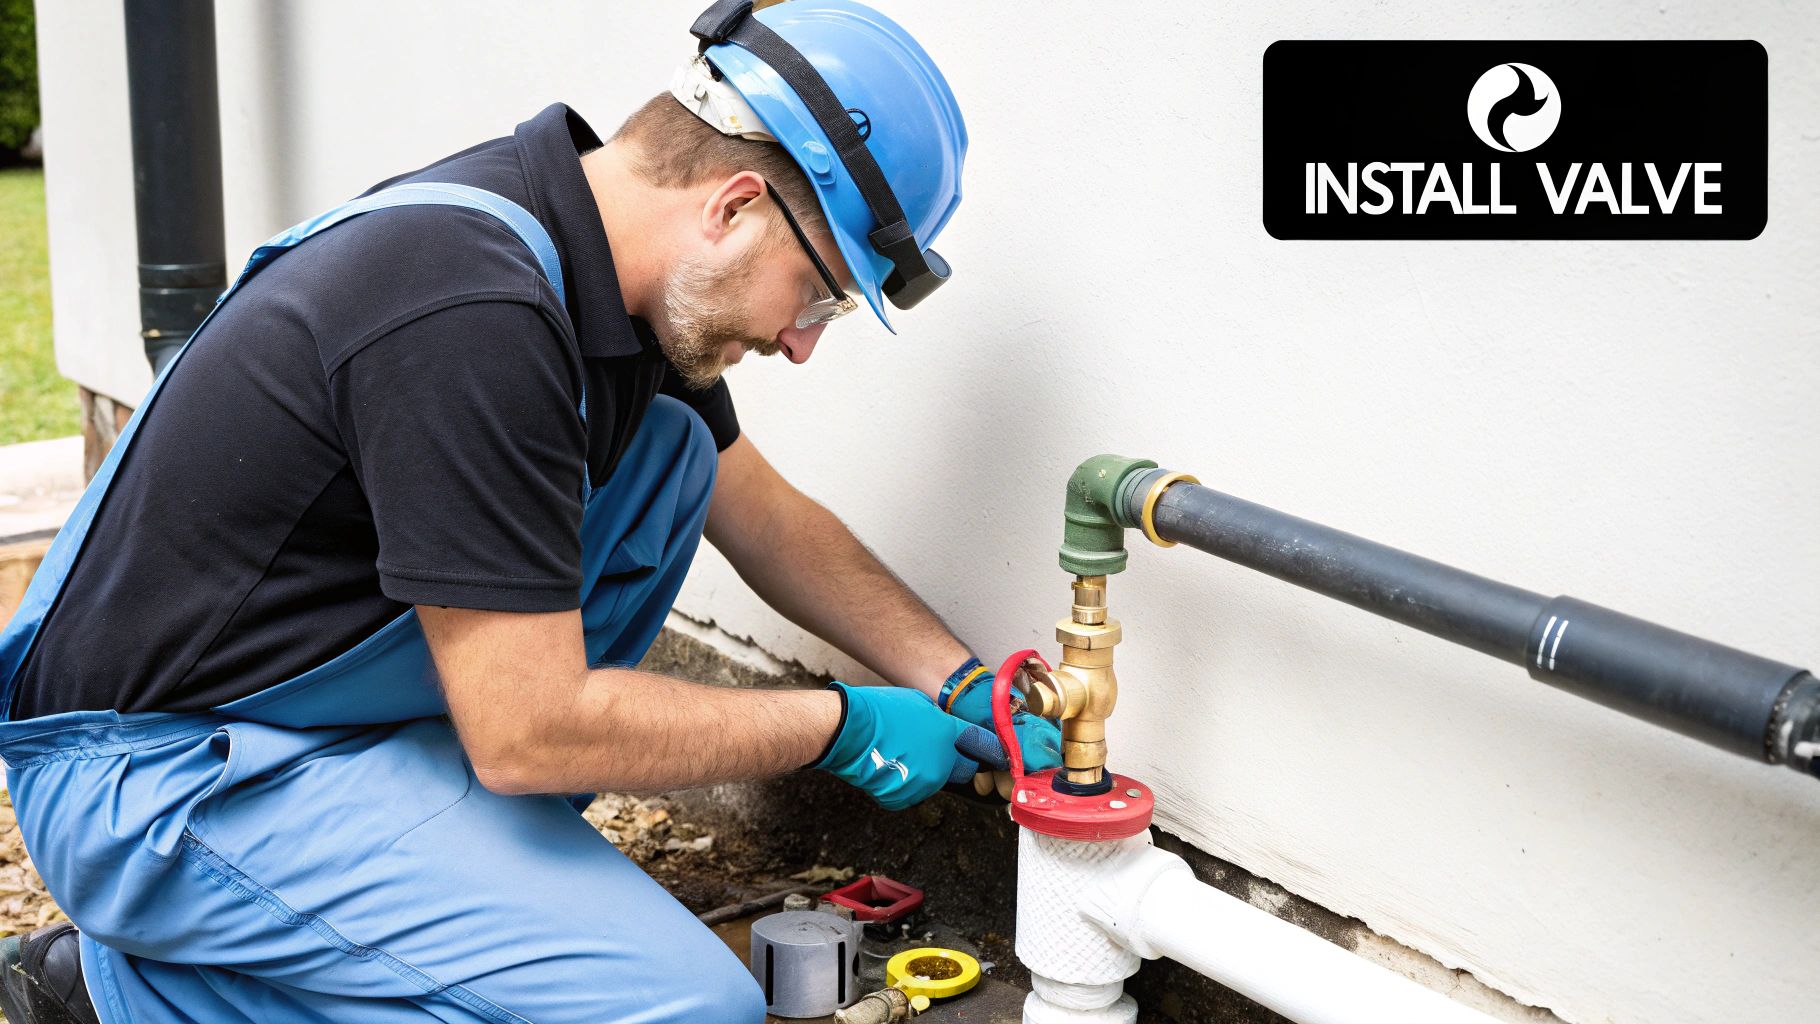
Now you're ready to pop the new valve on. Start by threading it into the port by hand. Seriously, don't skip this. It's the only way to feel if it's going in straight and avoid the dreaded cross-threading, which will wreck both the valve and the tank fitting.
Once it's hand-tight, then you can bring in the wrench for the final turns. The aim here is what we call 'snug-tight', not brute force.
One of the most common DIY blunders is over-tightening. It’s so tempting to give it that one extra grunt for good measure, but you can easily crack the brass valve body or strip the threads. The moment you feel solid resistance, stop. That's it.
Your installation needs to be secure, but not under excessive strain. Getting the feel for 'snug-tight' is key to ensuring a solid, leak-proof seal without breaking your brand-new component. Mastering this is a core part of learning how to install a pressure relief valve safely and effectively.
Installing the Discharge Pipe Correctly
A pressure relief valve is only ever as good as its escape route. The installation of the discharge pipe is a critical safety step, but it’s amazing how often this part of the job gets done incorrectly, especially in DIY setups. This isn't just a random bit of pipework; think of it as the emergency exit for dangerously hot water and steam. Get it wrong, and you've locked the fire escape.
First things first, let's talk materials. This pipe must be rated to handle the maximum temperature your system can dish out. I’ve seen standard PVC pipe used on hot water cylinders before, and it’s a genuine recipe for disaster. That plastic can melt and collapse, blocking the very path designed to keep you and your property safe. Always opt for a material like copper or CPVC that can take the heat without failing.
Ensuring a Clear and Safe Exit Path
Gravity is your best friend when running this pipe. The pipe must have a continuous, gentle downward slope all the way from the valve to its exit point. This simple rule ensures that when the valve does its job, water flows out freely and doesn't get trapped inside. Pooled water can freeze in cold weather or simply create a blockage, which you definitely don't want.
Where the pipe ends is just as important as how it gets there. It needs to terminate in a safe, visible location so you can immediately see if it's discharging. That stream of water is your first and clearest warning that the valve is operating and something needs attention.
When finishing the pipe run, stick to these key rules:
- The end of the pipe must not be threaded.
- It must not be sealed directly into a gully or drain.
- The outlet should point downwards, ideally finishing within 150mm (about 6 inches) of the floor or ground.
A blocked or improperly terminated discharge pipe can create a terrifying back-pressure situation. If steam or scalding water can't escape, the pressure inside your tank will just keep building. This completely defeats the purpose of the PRV and puts you at serious risk.
This principle of a clear, uncompromised path is a universal safety rule, whether you're working on a home water heater or industrial machinery. Take LPG road tankers, for instance; they are governed by incredibly strict regulations for PRV installation to guarantee public safety. You can read more about these specific UK vehicle regulations on the government's website. Your home system deserves exactly the same level of care.
Final System Checks and Testing
With your new pressure relief valve and its discharge pipe securely in place, you’re on the home straight. These final checks aren't just for peace of mind; they're critical for confirming the safety and integrity of your work. The first task is to bring the system back to life.
Slowly reopen the main supply valve. Rushing this can cause a water hammer, a noisy and potentially damaging shockwave that reverberates through your pipes. Let the system fill up gradually and gently.
Once the system is full, it's time to hunt for leaks. Even a perfectly tightened fitting can have a minuscule imperfection. The professional’s trick is simple: mix a bit of washing-up liquid with water in a spray bottle. Spray this solution liberally on all the new joints and connections you've made.
Verifying the Seal and Function
Now, watch closely. If you see any bubbles forming or growing, you have a leak, no matter how tiny. Don't be discouraged; just depressurise the system again and give the fitting a very slight additional turn—no more than an eighth of a turn—and re-test.
The final, and most important, test is to manually operate the valve. With the system fully pressurised, carefully lift the test lever. You should see and hear a healthy rush of water or air out of the discharge pipe.
This single action confirms two crucial things:
- The valve opens smoothly under tension.
- The discharge path you installed is clear and unobstructed.
Now, release the lever. It should snap back into place, and the flow should stop instantly. Check for any drips from the discharge pipe outlet. If it reseats perfectly with a tight seal, your installation is a success. This final check confirms that your system’s most important safety device is ready to protect you.
These principles of testing and verification apply to many system components. You can explore how different types operate by reading our guide to pressure reducing valves.
Common Installation Mistakes to Avoid
Knowing how to fit a pressure relief valve correctly is one thing, but understanding the common pitfalls is what separates a safe, professional job from a disaster waiting to happen. I’ve seen my fair share of installations go wrong, and learning from those mistakes is your best final check.
One of the most frequent blunders is simply over-tightening the valve. It’s a natural instinct to think tighter equals a better seal, but with brass fittings, that’s a quick way to cause a crack and an instant leak. Remember the 'snug-tight' rule: once you feel solid resistance, stop. A little extra muscle can lead to a lot of damage.
Another classic error is installing the valve in the wrong orientation. The vast majority of PRVs are designed to be installed vertically. If you fit one horizontally or, even worse, upside-down, it can stop the valve from opening or reseating properly. This renders it completely useless in an emergency.
Mismatched Ratings and Incorrect Sealants
The single most dangerous mistake you can make is mismatching the PRV’s pressure rating with your system's demands. If the valve’s rating is too high, it will never open when pressure spikes, putting you at risk of a catastrophic tank failure. If it's too low, it will constantly weep or discharge, wasting energy and pointing to a serious mismatch.
Always double-check the manufacturer's data plate on your appliance. The new valve’s pressure rating (in bar) and temperature rating (°C) must be an exact match. There is absolutely no wiggle room here.
In the UK, systems like air receivers often come with factory-fitted PRVs calibrated to the vessel's maximum working pressure (PS). These are designed to relieve pressure at up to 10% above this PS, but you should never rely on this without checking the specs yourself. For a deeper dive into these settings, the guidance on safety valve settings from BCAS is an excellent resource.
Finally, don't get caught out by these simple but critical slip-ups:
- Using the wrong sealant: Hardening compounds are a definite no-go. They can flake off and foul the delicate internal mechanism of the valve. Always stick to PTFE tape or an appropriate non-hardening pipe dope.
- Applying PTFE tape the wrong way: This one is crucial. You must wrap the tape clockwise on the male threads. If you wrap it the other way, it will simply unravel as you tighten the valve, completely defeating the purpose and preventing a good seal.
Got Questions About Your New PRV?
Once you’ve fitted a new pressure relief valve, it's natural to have a few questions pop up. Getting to grips with the answers is the best way to keep your system running safely and give you peace of mind.
How Often Should I Replace My Pressure Relief Valve?
It's good practice to give the valve's test lever a quick lift once a year, just to make sure it moves freely and hasn't seized up.
As for a full replacement, most plumbers and manufacturers will tell you to swap it out every 3-5 years. You should also replace it immediately if you spot any leaks, signs of corrosion, or if it fails that simple manual test. When in doubt, always have a look at your system's manual for specific advice.
What Happens If I Install a PRV with the Wrong Pressure Rating?
This is a critical one. If you fit a valve with a pressure rating that’s too low for your system, it will constantly open up and drip, unable to handle the normal operating pressure.
Go the other way and install one with a rating that’s too high, and you've created a much bigger problem. It won't open when a dangerous pressure spike occurs, completely defeating its purpose and putting your water tank at risk of a catastrophic failure. Always, always match the PRV's rating to the maximum working pressure stamped on your system's data plate.
A brand new valve that's dripping usually points to one of three things: the system pressure is simply too high, a bit of grit is stuck in the valve seat, or you've unfortunately got a faulty valve.
First things first, check your system's pressure. A good quality pressure gauge for up to 10bar systems will give you an accurate reading. If the pressure looks fine, try lifting the test lever for a moment to flush out any debris that might have gotten lodged inside. If it still drips after that, the valve is likely defective and needs replacing straight away.
For all your pressure control needs, trust the experts. Solenoid Valve World offers a complete range of valves and components, backed by UK-based technical support and free next-day delivery. Find the perfect part for your system at https://solenoid-valve.world.