A Pro's Guide to Replacing Solenoid Valves
Before you even think about swapping out a solenoid valve, the first and most important job is to make sure it's actually the problem. Is it stuck open? Failing to shut properly? Making a weird buzzing noise? Pinpointing the symptom helps you fix the root cause, rather than just throwing a new part at it.
Diagnosing a Failing Solenoid Valve
Jumping straight to a replacement without a proper diagnosis is a classic way to waste time and money. I've seen it happen many times. A seemingly broken valve can sometimes be a symptom of something else entirely, like the wrong voltage hitting the coil or a bit of debris stuck in the pipeline. Knowing the tell-tale signs of failure means you can make the right call.
Telltale Signs of Failure
One of the most common culprits is a burnt-out coil. If the valve is completely dead and silent when it should be kicking into action, the coil is the first thing to suspect. You can usually confirm this with a multimeter. Check the resistance across the terminals – an open circuit is a dead giveaway that the coil has failed.
On the other hand, if you hear a constant humming or buzzing, you're likely dealing with an electrical issue, but not necessarily a total failure. This often points to low voltage, the wrong type of power (AC instead of DC, for instance), or even a mechanical bind inside that's stopping the plunger from seating properly.
Persistent leaks are another dead ringer for a failed valve. This is typically down to a worn or damaged internal seal or diaphragm. Over time, especially with harsh chemicals or high temperatures, the material simply gives up, and the valve can't create a proper seal anymore. In these cases, the mechanical parts are shot, and a full replacement is your best bet.
A valve that's stuck either open or closed points directly to a serious mechanical or electrical fault. This could be anything from a broken internal spring to debris physically jamming the plunger. It needs immediate attention to avoid disrupting your entire system.
Isolating the Root Cause
Solenoid valves are workhorses in industries all over the UK, and when they fail, it can be costly. Things like continuous operation, coil winding failure, and seal deterioration are the usual suspects. For critical infrastructure, like in UK water plants, it's worth noting that replacing older solenoid valves with modern, energy-efficient models can slash operational costs by up to 15%.
By figuring out whether you're facing an electrical or a mechanical fault, you can decide on the right course of action. If you're working with air-powered systems and want to dive deeper, you might find our guide on pneumatics solenoid valves helpful.
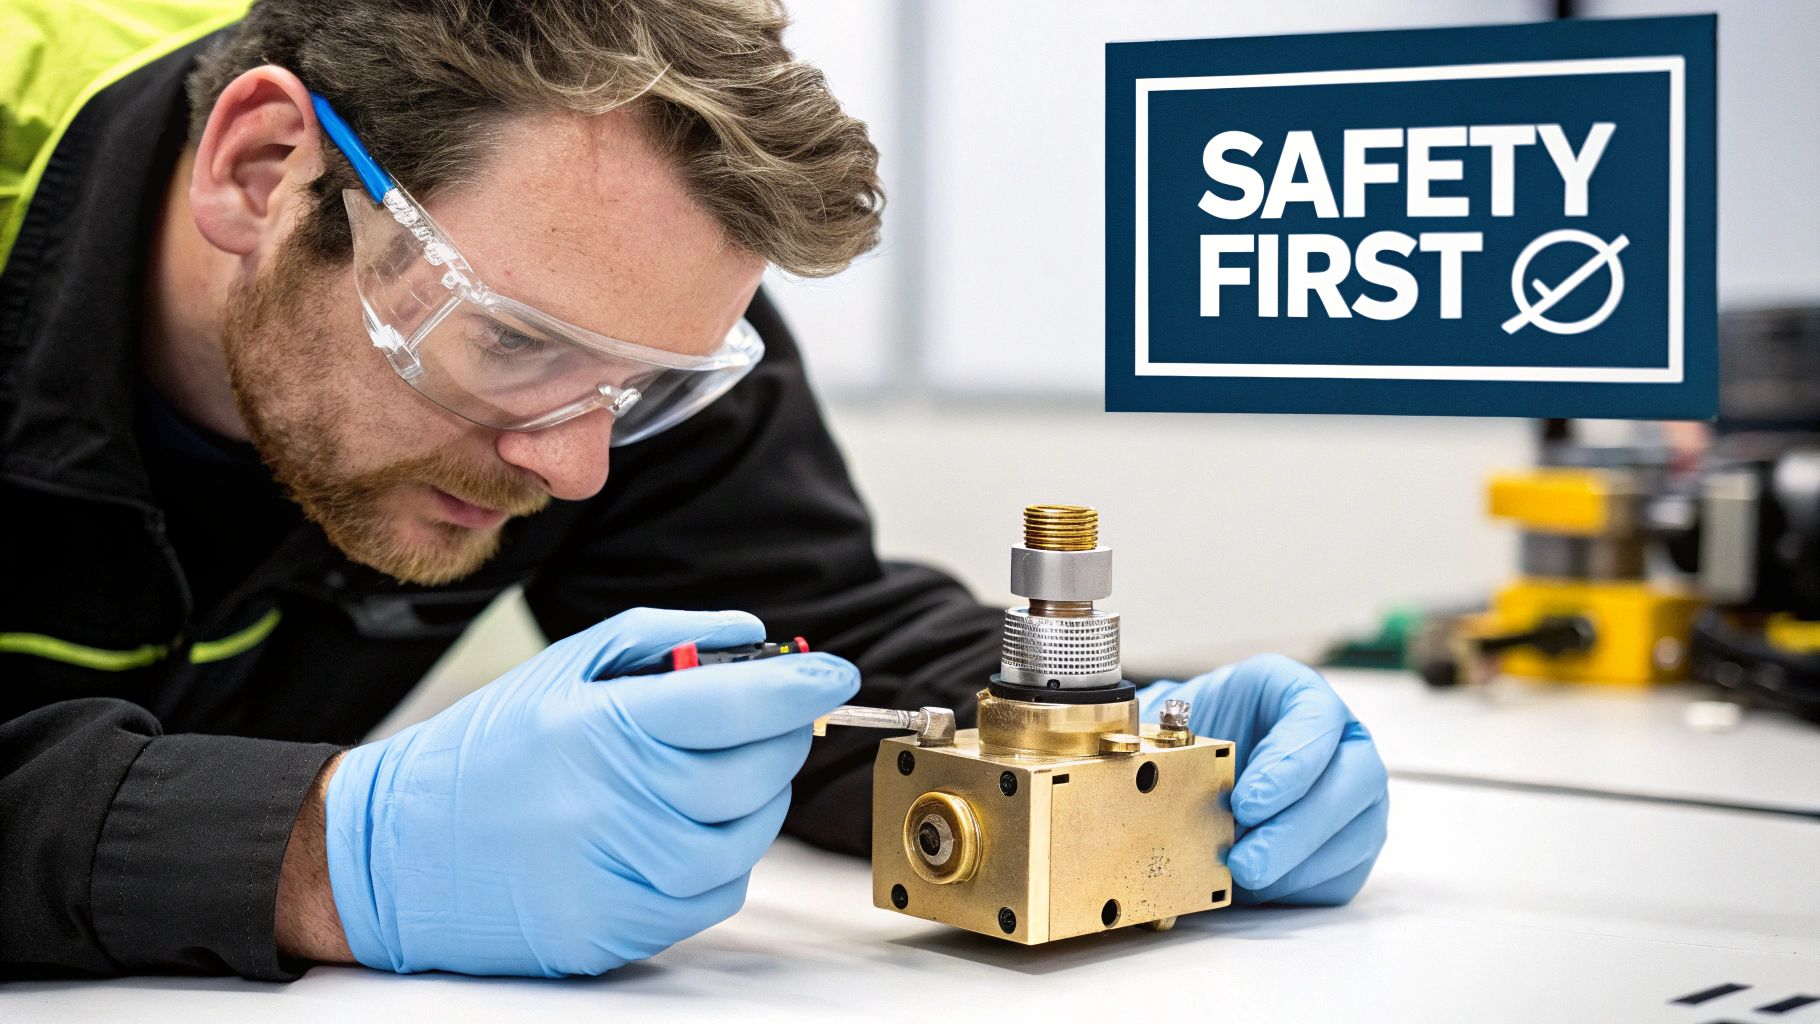
Assembling Your Toolkit and Safety Gear

A successful solenoid valve replacement starts long before you even touch a wrench. I've seen countless jobs go sideways because of poor preparation. A smooth, professional job hinges on having the right tools on hand and following every safety protocol to the letter. What a seasoned pro carries goes beyond a generic checklist; it’s about having what you need to handle the unexpected.
Your basic kit should obviously include adjustable wrenches or spanners sized for the valve fittings, a good set of screwdrivers for the electrical terminals, and wire strippers. But here's a pro tip: always have the correct thread sealant for your specific application. Using the wrong type is a classic mistake that can lead to slow, persistent leaks or, even worse, system contamination down the line. A well-stocked kit is your best friend on any job; you can find more on the essential plumbing tools that every technician should have.
Before you get started, it's wise to lay everything out. A quick check now saves a frantic search later. Here’s a rundown of what you should have ready.
Essential Tools and Safety Gear Checklist
| Item | Purpose | Safety Note |
|---|---|---|
| Replacement Solenoid Valve | The new component to be installed. | Triple-check that it's the correct model, voltage, and material. |
| Adjustable Wrenches/Spanners | For loosening and tightening valve fittings. | Ensure a snug fit to avoid stripping the nuts or valve body. |
| Screwdrivers | For disconnecting and reconnecting electrical wiring. | Use insulated screwdrivers for added electrical protection. |
| Wire Strippers/Cutters | To prepare wires for connection to the new coil. | A clean strip ensures a solid electrical connection. |
| Thread Sealant/PTFE Tape | To create a leak-proof seal on threaded connections. | Use a sealant that's compatible with the system's media (e.g., gas, water). |
| Safety Goggles/Glasses | To protect your eyes from debris or fluid spray. | Non-negotiable. Always wear them from start to finish. |
| Gloves | To protect hands from sharp edges, chemicals, or heat. | Choose a type appropriate for the system's temperature and fluid. |
| Lock-Out/Tag-Out Kit | To safely isolate electrical power to the valve. | Prevents accidental energisation while you're working. |
| Rags or Towels | For cleaning up spills and wiping down components. | Keep the work area clean and dry to prevent slips. |
Having these items organised and within reach turns a potentially stressful task into a straightforward procedure.
Choosing the Right Valve
Honestly, the single biggest mistake you can make is trying to fit the wrong valve. Before you even think about starting, you must triple-check that your replacement part is a perfect match. This isn’t just about the pipe size; it’s about total system compatibility.
- Voltage and Power: Always confirm the voltage (24V DC, 230V AC, etc.) and power type match your circuit. A mismatch is a guaranteed way to instantly burn out the new coil. It’s a costly and embarrassing error.
- Port Size and Threads: The physical connection has to be exact. Make sure the port diameter and thread type (e.g., 1/2 inch BSP) are identical to the old valve. Don't try to force it.
- Material Compatibility: The valve body and, crucially, the seal materials must be rated for the fluid or gas in your system. I've seen people install a valve with a standard NBR seal in a steam application, only for it to fail in a matter of days.
For a much deeper dive, our guide on choosing a solenoid valve breaks down all the technical specifications you need to select the right component with confidence.
Non-Negotiable Safety Steps
Safety is paramount; there are no shortcuts here. Always begin by implementing a full lock-out/tag-out procedure on the electrical circuit that powers the valve. This completely removes the risk of the system being energised while you're working on it.
The most critical safety action is depressurising the line. I once saw a junior technician get a nasty surprise because he skipped this step on a compressed air line. The valve shot out of his hands like a cannonball when he loosened the final fitting. Always bleed the pressure safely before you start turning any wrenches.
A Practical Guide to Valve Removal and Installation
Right, with your tools gathered and the safety checks done, it’s time to get your hands dirty. Swapping out a solenoid valve is a pretty straightforward job, but as with most things, the devil is in the detail. Getting this part right means no leaks, a valve that works as it should, and no need to pull it all apart and start over again.
Here’s one of the simplest but most valuable tips I've picked up over the years: use your phone. Before you touch a single wire, snap a quick, clear photo of the existing setup. This picture is your get-out-of-jail-free card when you’re trying to remember which wire goes where, especially if the system is a bit more complex. It takes two seconds and can save you twenty minutes of guesswork later.
Tackling Removal Head-On
First things first, let's get the electrical coil disconnected. Carefully loosen the terminal screws and pull the wires clear. With the wiring safely sorted, you can turn your attention to the mechanical fittings. This is where you might hit a snag, particularly on older pipework where corrosion has practically welded the fittings in place.
If you come across a stubborn, rusted-on fitting, fight the urge to just put more muscle into it. That's a surefire way to damage the pipes or whatever equipment the valve is connected to. Instead, grab a good quality penetrating oil and give it time to soak in and do its job. A few sharp taps with a small hammer can also help to break the seal of the corrosion. Always use two spanners: one to hold the pipe steady (your "back-up") and the other to turn the fitting. This simple technique stops you from twisting and potentially damaging the pipework further down the line.
The whole removal process really boils down to a few key actions.
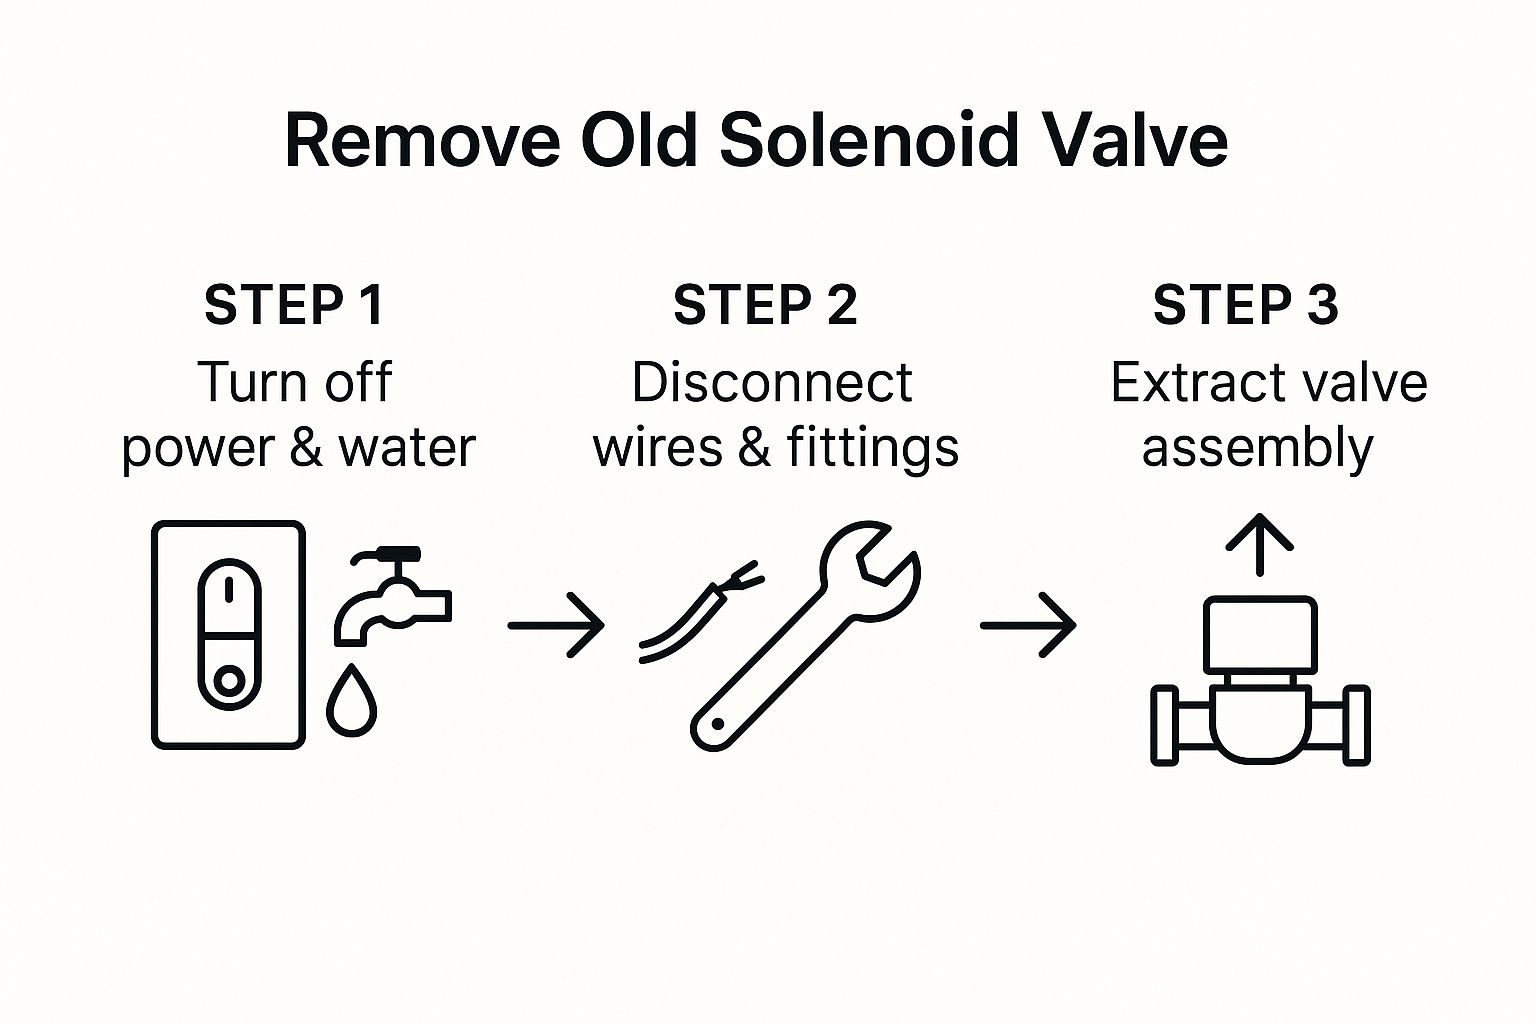
This visual is a great reminder of the workflow: isolate the valve, disconnect everything, and then remove it. Keeping to this logical sequence makes the job much safer and more organised.
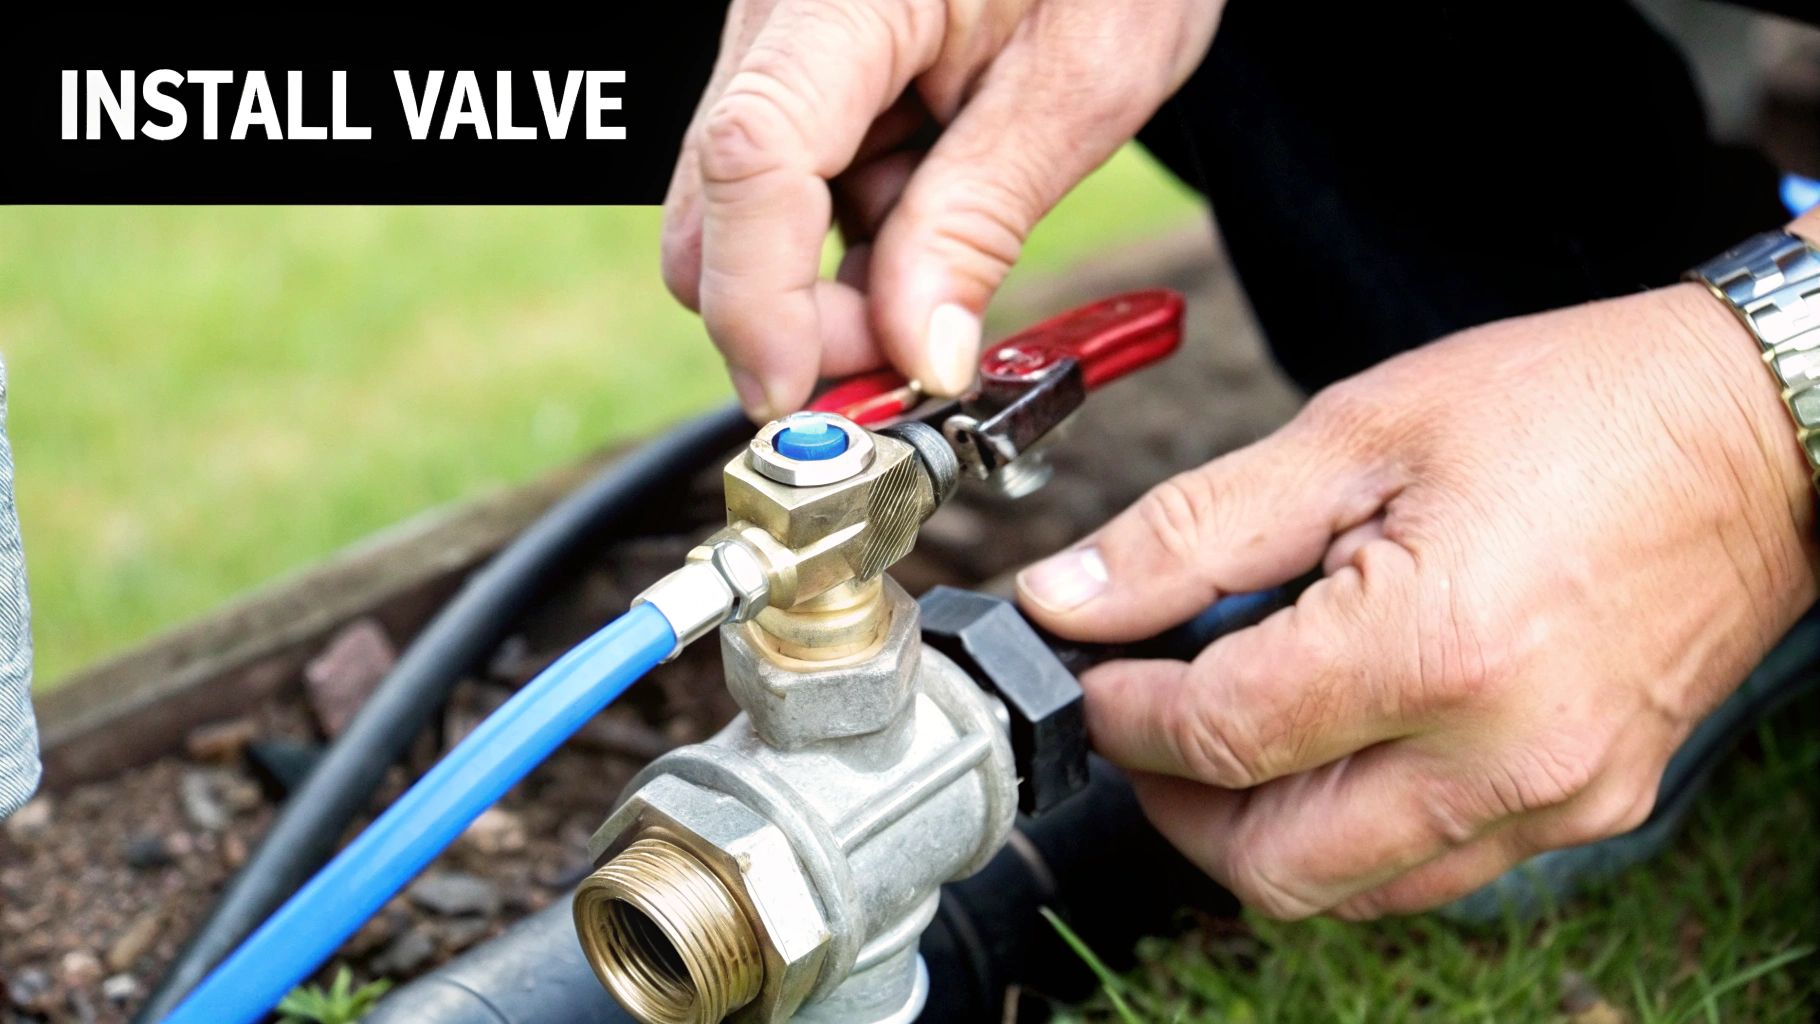
Installing for a Perfect Seal
Once the old valve is out, take a moment to clean the pipe threads thoroughly. Get rid of any old sealant, rust, or grime. You need a clean surface to get a leak-proof seal with the new valve – no shortcuts here.
When you’re ready to fit the new one, apply your thread sealant correctly. If you're using PTFE tape, remember to wrap it clockwise on male threads. This stops it from bunching up or unravelling as you tighten the fitting. Apply just enough to create a seal; piling on too much tape can add stress and even crack the valve body. Start by hand-tightening the valve, then use a spanner for another one or two turns. Do not over-tighten it. This is probably the most common mistake people make, and it can cause tiny hairline fractures you won't spot until it's too late.
A properly installed valve shouldn't need a huge amount of force. The seal comes from the threads and the sealant working together, not from brute strength. If it feels like you're really having to force it, stop and check what's wrong.
Here in the UK, especially in industrial plants, changing a solenoid valve can be more involved than a simple swap. For instance, high-temperature steam applications can cause the coil insulation to break down faster, meaning you'll be replacing them more often with specialised, heavy-duty components. You can find out more about how different materials affect replacement cycles and costs in this market analysis from Mordor Intelligence.
Finally, reconnect the electrical coil, using that photo you took earlier as a reference. Double-check that the connections are tight and the coil is sitting properly on the valve stem. A loose connection can lead to buzzing or make the valve work intermittently, which undoes all your careful work.
Commissioning Your New Solenoid Valve
 With the new valve securely in place, the job isn’t quite done. This final commissioning stage is your professional seal of approval, proving that your hard work has resulted in a safe, reliable system. It’s tempting to rush this part, but that can undo all your careful efforts.
The first thing to do is re-pressurise the system, and the key here is to do it slowly. Cranking open the main supply can create a powerful surge, often called a water hammer, which can easily damage the new valve, its seals, or other components in the pipeline. You’ll want to gradually introduce pressure, allowing the whole system to stabilise gently.
Leak and Functional Testing
Once the system is back up to its normal operating pressure, it's time to go leak hunting. A simple spray bottle filled with soapy water or a specialised leak detection fluid is your best friend for this. Apply it liberally to every threaded connection you’ve worked on.
If you spot bubbles forming or growing, you’ve got a leak. No need to panic. Just de-pressurise the system again, double-check your fittings, and if necessary, re-apply your thread sealant before carefully re-tightening everything.
A leak, no matter how small, is a clear sign that something isn't quite right. Ignoring a tiny drip now can spiral into significant problems down the line. It's always worth taking the time to fix it properly before calling the job finished.
With a confirmed leak-free installation, you can now safely re-energise the electrical circuit. It’s time for a full functional test. Cycle the valve open and closed several times, listening for that clean, crisp "click" as it actuates. You should also visually confirm it's moving as intended. This simple check confirms that both your mechanical and electrical work is sound.
For UK industries, the timely replacement of even a small component like a miniature solenoid valve can have a surprisingly big impact. When integrated with modern predictive maintenance systems, it's estimated to reduce unplanned outages by 20%. This final check ensures your system performs exactly as it should, safeguarding that reliability. To understand more about the components themselves, our detailed guide on the basic solenoid valve is a great place to start.
Common Pitfalls in Valve Replacement and How to Avoid Them
Anyone who’s spent time in the field has a story about a supposedly simple valve replacement that went sideways. It happens. But learning from the most common slip-ups can save you a world of time and headaches, making sure the job gets done right the first time.
One of the easiest mistakes to make, and one I’ve seen more times than I can count, is installing the valve backwards. Most solenoid valves have a clear flow direction arrow stamped right on the body for a reason. Ignoring it isn't just a minor oversight; it can cause the valve to malfunction or fail completely. Always, always double-check the orientation before you even think about tightening the fittings.
Mismatches and Mishaps
Another classic trap is grabbing the wrong thread sealant. You can't just use any old goop; a sealant made for water systems might break down completely when it comes into contact with certain oils or gases. It’s a small detail that can lead to big problems.
Speaking of problems, let’s talk about over-tightening. It’s tempting to give that wrench an extra crank for good measure, but that's a rookie mistake. Applying too much force can easily crack the valve body. You’ll be left chasing a phantom leak that’s nearly impossible to find.
A valve's pressure rating isn't a suggestion—it's a critical safety limit. Always check that the new valve's maximum pressure rating meets or exceeds your system's demands. Getting this wrong can lead to catastrophic failure.
Incorrect wiring is another major one. Hooking up a 24V DC coil to a 230V AC supply will fry it in an instant. It’s a costly, and frankly, embarrassing mistake.
Beyond these hands-on errors, you’ve got to make sure your work is up to code. For any job involving complex electrical systems, being fully aware of compliance with local rules, like the Australian electrical standards and regulations, isn't just good practice—it's essential for safety.
Frequently Asked Questions About Replacing Solenoid Valves
Even with a detailed guide, a few questions always seem to pop up when you're in the middle of a hands-on job like swapping out a solenoid valve. This is where we tackle the most common queries, helping you find a quick answer without having to thumb back through the entire guide.
Can I Just Replace the Coil Instead of the Entire Valve?
Yes, absolutely. In fact, if the valve body is still in good nick and the problem is purely electrical—like a burnt-out coil—just replacing the coil is the smarter move. It will save you a good bit of time and money.
First, you need to be certain the fault is electrical. Once confirmed, your priority is to find an exact replacement coil that matches the original's voltage and physical dimensions. The process is straightforward: cut the power, remove the retaining clip or nut, slide the old coil off the stem, and fit the new one.
Why Is My New Solenoid Valve Leaking?
Nine times out of ten, a leak from a brand-new valve comes down to how the threads were sealed. This could mean you've used too little sealant, wrapped the PTFE tape the wrong way (it should go with the thread, not against it), or used a paste that isn't compatible with the fluid in your system.
Another common mistake is getting the torque wrong. If it's too loose, you won't get a proper seal. But go too tight, and you risk damaging the threads or even cracking the valve body itself. Always stick to the manufacturer’s guidelines for a secure, leak-free connection.
How Do I Confirm I Bought the Right Replacement Valve?
Before you even think about reaching for a spanner, put the new valve next to the old one and do a quick comparison. If you don't have the old one, check against your system's technical specifications.
You need to verify four critical points:
- Voltage: Does it match your system? (e.g., 24V DC, 230V AC)
- Port Size: Are the threads the same size? (e.g., 1/2 inch BSP)
- Pressure Rating: Can it safely handle your system’s operating pressure?
- Materials: Are the body and seal (NBR, EPDM, Viton, etc.) suitable for the liquid or gas you're running through it?
Getting these details right from the start is the difference between a successful job and a frustrating one.
For a comprehensive selection of valves and expert support, trust Solenoid Valve World. Find the exact part you need with free next-day UK delivery at https://solenoid-valve.world.